Showing posts with label DIY. Show all posts

Wednesday, August 3, 2011

Modesty Shorts

Last night I made modesty shorts for Joey and blogged about it (see I See London, I See France...), but due to technical difficulties the photos weren't published.  Aaargh. 

I purchased six pairs of leggings from babyGap and Target for $3.50 average.  I chose colors that would coordinate with her skirts.  I washed and dried them to preshrink.  Tilt your head to the right to view the photo below.
Last night I only committed to making one pair, so I chose a pair with stripes because those would be easier to make straight, even cuts.  I cut them about two inches longer than I wanted them to be to allow for the hem.  I then turned the shorts inside-out, folded the raw edge twice, and ironed. 
Then I stitched.  Easy peasy.
I'm very pleased with the results.  It would be cute to embellish these shorts with bows, a la Monkeybar Buddies, or even using a Bedazzler.  I'm kidding about the Bedazzler.  Or am I?

Tuesday, August 2, 2011

I see London, I see France…

Yep, folks, we can all see Joey's underpants.

My little princess insists on wearing skirts every day. Mostly tutus, if we want to be specific. It doesn't bother me in the least. Skirts are easier than pants when it's time to use the potty. And she looks pretty darn cute in a tutu.

Today Joey's teacher mentioned that the boys were noticing her underpants and that it would be better to send her to school with shorts under her skirt. She doesn't really understand the concept of modesty yet, but I don't want for her to be teased. Searching online, I found modesty shorts called Monkeybar Buddies, but at $16 a pop, I quickly determined that I could do better.

I decided to make modesty shorts for Joey. Not from scratch, mind you. The plan was to purchase leggings and shorten them. I went to babyGap, which was offering an additional 25% off their sale items, plus another 10% for using a GapCard, and got four pairs of leggings for about $3.50 each. Next I went to Target and got two more pairs, also $3.50 each.

First, I washed and dried them to prevent additional shrinkage.


Next, I made the cuts. A rotary cutter and self-healing cutting mat would have come in very handy, but I just used good old-fashioned scissors. Well, maybe not good scissors, but scissors. I have a rotary cutter but not a self-healing cutting mat (hint, hint). I cut the length about two inches longer than I wanted them to allow for the hem.

I turned the pants inside-out and folded the raw edge over twice and ironed. This way I didn't need to pin. I don't pin. I'm lazy.


I stitched the hem with a plain old straight stitch, but kept the stitches somewhat loose. I worried that if the stitches were tight that they might pop. It all worked great for the first leg, but then I ran out of thread. So one leg has two different thread colors. At least it's on the inside.


The results? I think they look great, but I guess we'll see in the morning when Joey gets dressed. One down, five to go…


Wednesday, June 1, 2011

Joey's New Room

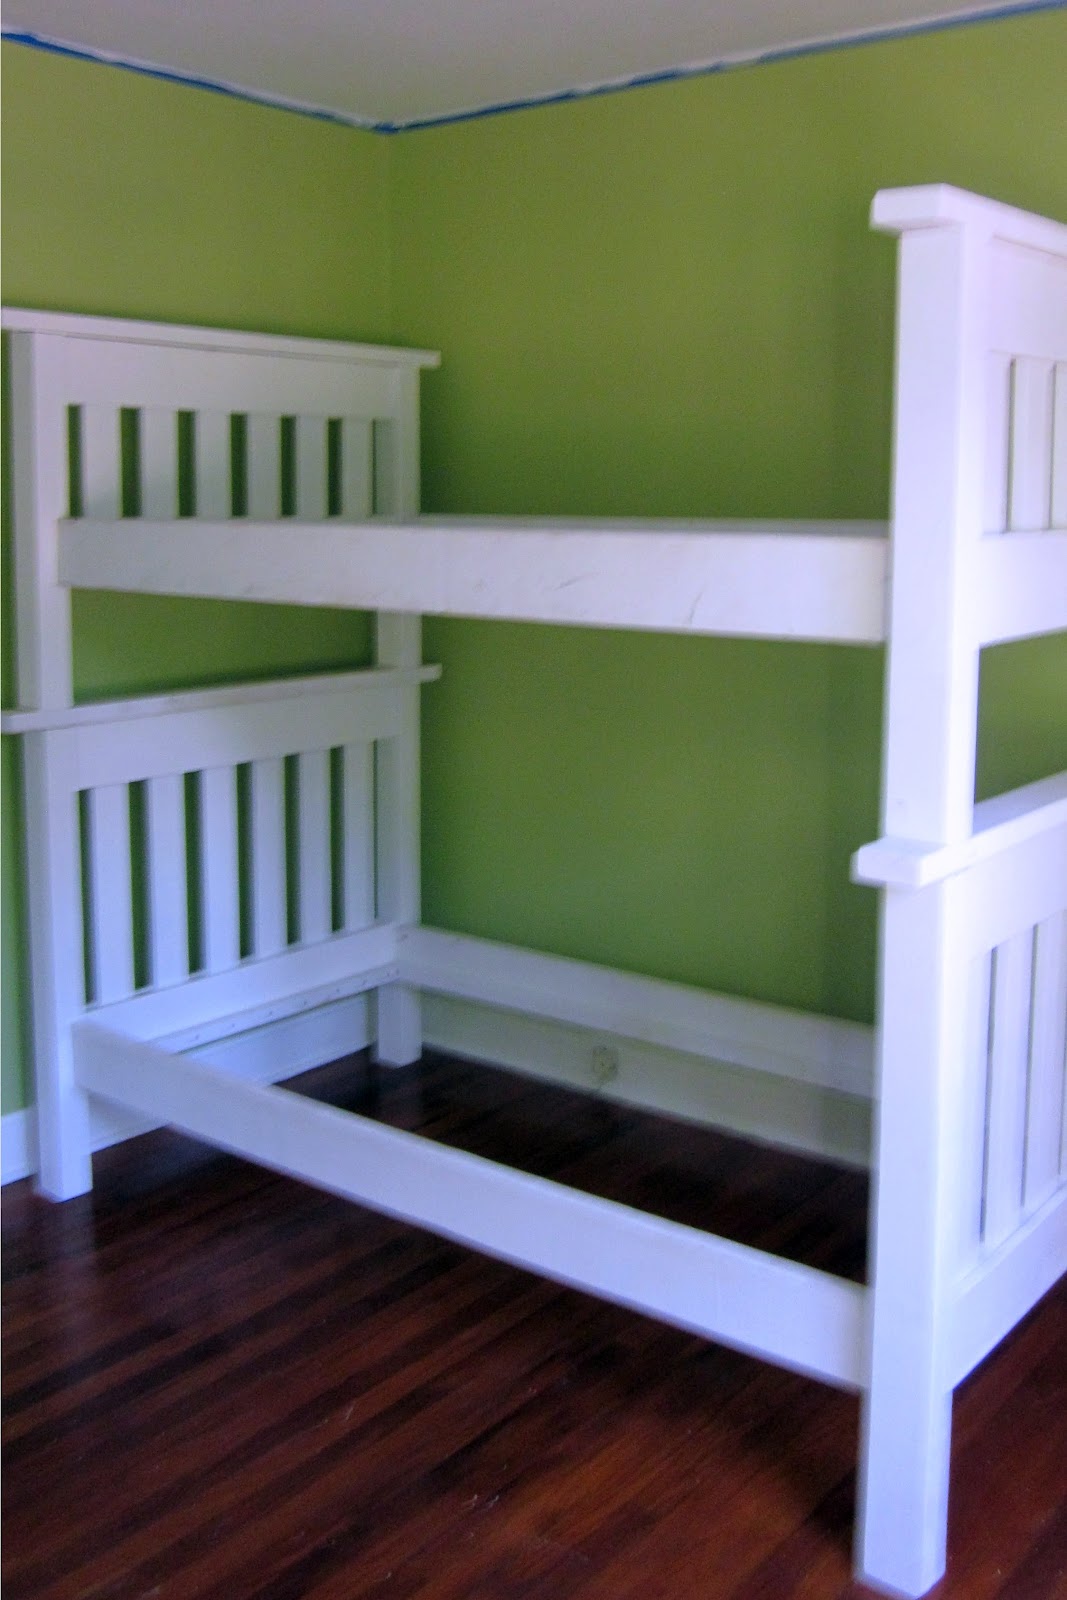
About a year ago, I was inspired to build bunk beds for Joey.  Yes, build.  Like with wood and tools.  And my pregnant self was flying solo because my husband didn't quite share my vision.  It took several weeks but I managed to get all of the pieces cut, put together, and primed.  I assembled the bottom bunk in Joey's room and (oops!) they didn't quite fit.  Well, they fit, but since the room has two walls of windows, the only place that they "fit" was in front of a window, which just didn't look right.  Plus she would kick the blinds with her feet and I really didn't want them to fall on her.  So I didn't even bother to assemble the top bunk. 
Since I was pregnant with Charlotte at the time, this project went on the back burner.  But almost a year later, after several months of looking at Joey's incomplete bed and the pieces of the top bunk scattered throughout the house, I needed to check this project of my list.

I realized that Joey's bunk beds would fit better in our office/guest room, and when I suggested the idea to Paul he wasn't opposed to it.  Although the room is smaller, it has more wall space which was needed for the beds.  The room needed some work, though.  The walls needed to be painted (green, since it's Joey's favorite color), the ceiling needed to be scraped, sanded, and repainted, and all of the trim needed to be painted because it was a lovely shade of dinge.

We decided to tackle this project over Memorial Day weekend.

Our plans were to get started Friday night since Joey was sleeping at a friend's house.  We weren't fond of the popcorn-textured ceiling, so Paul's task was to scrape, sand, and paint it.  We cleared most of the furniture out of the room, but Paul wasn't feeling well thanks to something that he *ahem* consumed, so the ceiling didn't get done that night.

Paul was feeling better Saturday morning, so he got to work on the ceiling while Charlotte and I bought our paint.  Joey wanted her room to be green, her favorite color, so we wanted a green that flowed well with the rest of the house, was youthful, and not too bright.  We settled on Laura Ashley Apple 4 (available at Lowe's), but had it mixed in Glidden at The Home Depot to save some money.  Saturday was spent working on the ceiling, painting the walls, and painting the trim.  That seriously took all day.  Things take twice as long when you have children to tend to!
Disassembling the desk
Charlotte and Macy checking out the action
After scraping and sanding the ceiling
Fresh paint
On Sunday, we painted more trim and Paul painted the ceiling.  We then set up her bunk beds in her new room.  That was fun.  Fortunately our neighbors had company and we were able to borrow some manpower to lift the top bunk into place.  It was heavy as all get out.
On Monday, while Paul was at the park with both girls, I painted the beds and moved the girls' dresser in.  When he returned we attached the beds, installed the rails on the top bunk, and moved the mattresses in.  I've realized that making the bed on the top bunk is really a chore, so if you have some tips please share!

Voila!  Joey's beds:  a year in the making! 
There is still work to be done.  In Joey's old room, she didn't have a place for books, besides the messy pile next to her bed (her books are kept with the grown-up books in the living room).  I saw a blog post about using Ikea spice racks as book holders and thought that they would be great in Joey's new room.  Paul happened to be in Atlanta for business a few weeks ago and actually offered to go to Ikea to purchase some of these spice racks.  We'll be mounting them on the wall soon.

We'll need to hang Joey's responsibility chart and the clock that she wanted for her birthday, and Picasso line drawings from her old room.

Right now Charlotte's crib is still in Joey's old room, our new office/play room/guest room.  But cribs are temporary, and when she's big enough to sleep in a big girl bed she can have the top bunk.  Kidding.

All of the work that we've put into Joey's new room has been totally worth it.  She is thrilled with her new space.

Tuesday, April 26, 2011

Josephine Losavio: Clown?

Tomorrow is Circus Day at Joey's school.  All of the kids will be dressing up like clowns or circus animals.  Although clowns creep me out, I figured a clown costume would be easier to DIY than an animal costume.

I picked up some supplies at Hobby Lobby:  a green t-shirt (because green is Joey's fave), pom poms, felt, and a sheet of green foam. 
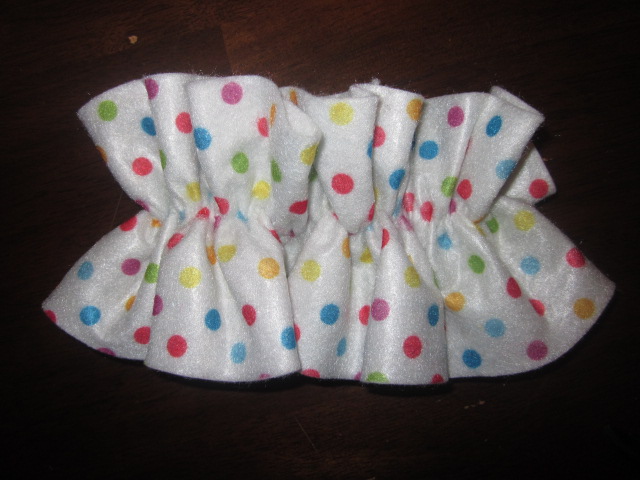
I began by making a ruffled collar from the felt.  I cut the sheets lengthwise and stitched three of the pieces together, creating a long strip.
I stitched some elastic to one end of the felt, then for the length of the felt, I stitched around the elastic using a zigzag stitch.  That's a fancy trick I picked up from sewing class.
To finish the collar, I stitched the ends together.  I just hope that it doesn't choke Joey.
Next I got to work on Joey's hat.  I decided to use the foam to make a cone-shaped hat with pom poms.  I cut the foam into a round-ish triangle (sorry -- that's mommy brain for you) and then attached the edges with hot glue.  I glued a large pom pom to the top of the hat and small ones around the bottom.
I  hot glued some large pom poms to the front of the t-shirt and Voila!  A clown costume!

Sunday, April 10, 2011

House Painting

As our Christmas gift, Paul's parents gave us house painting.  The paint has been purchased and in a few short weeks the Losavio family will be coming to Tuscaloosa to paint our house!  I just hope that my mother-in-law is praying away the rain!

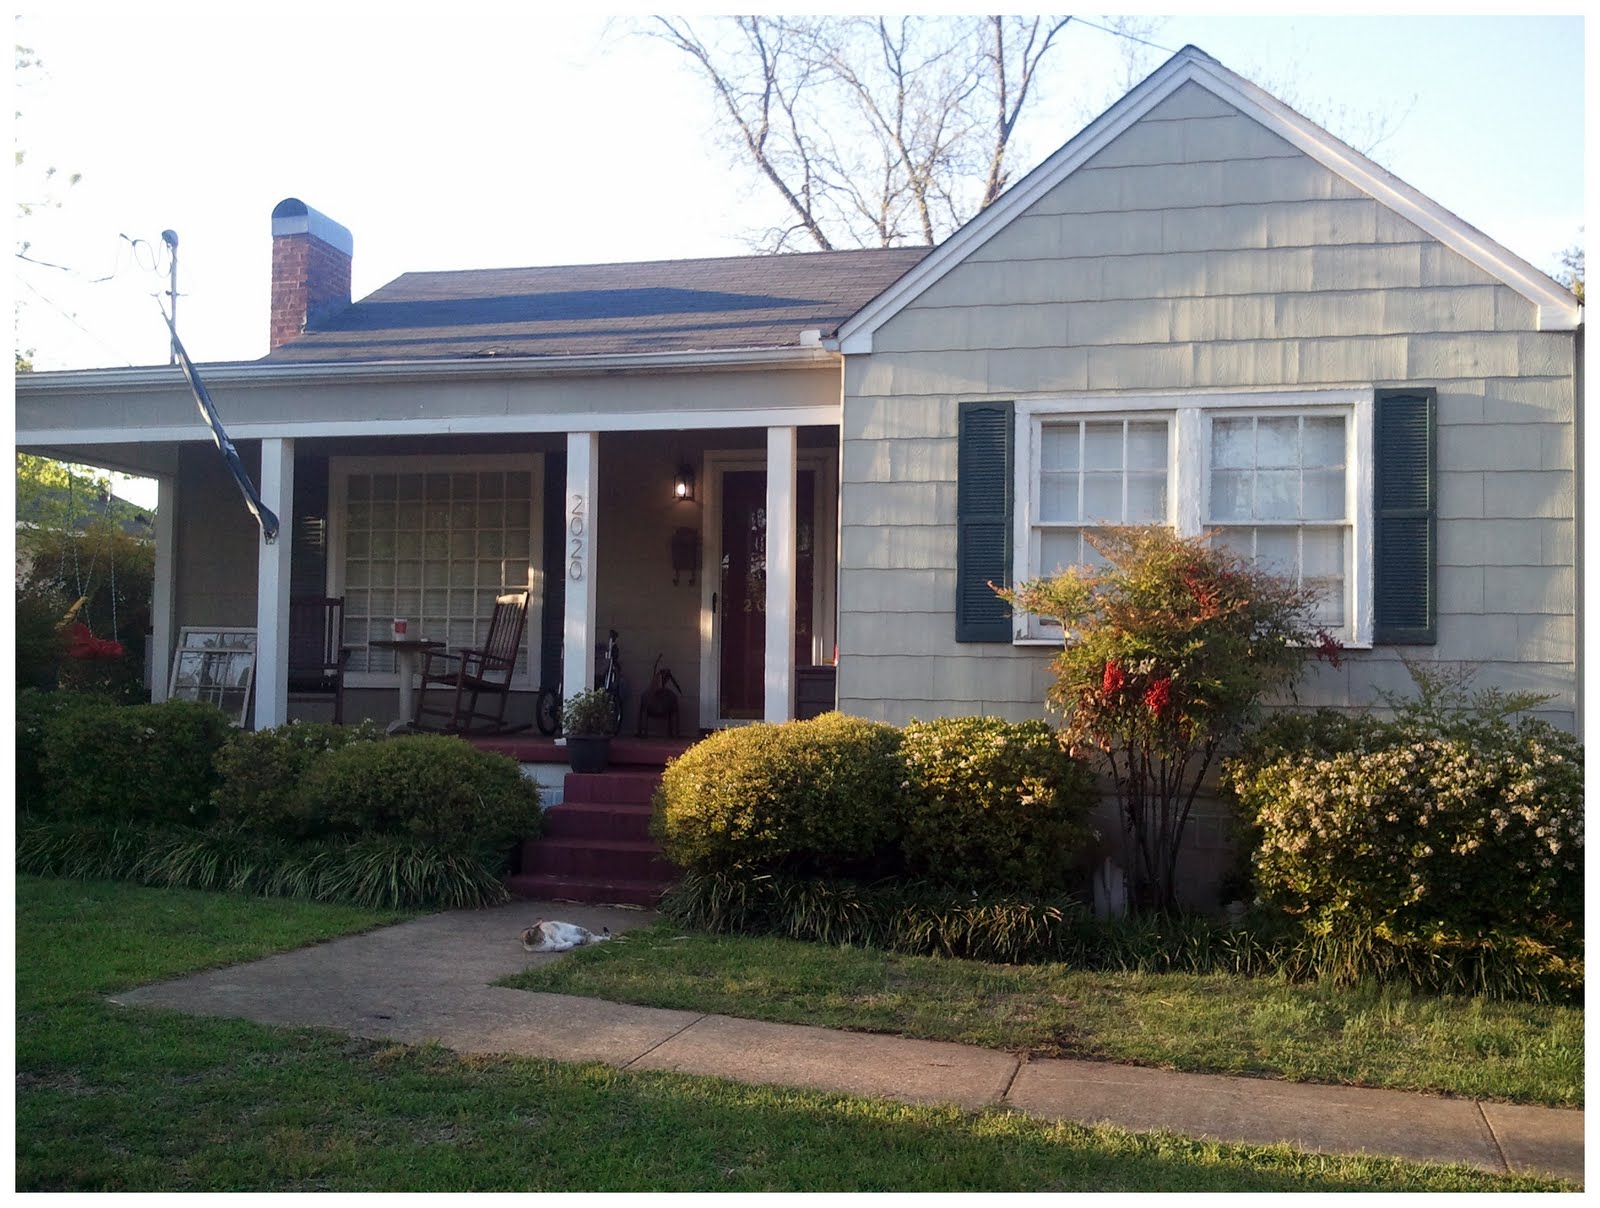
This is what our house looks like now.  Boring.  And in desperate need of new paint.

This is what (we hope) it will look like when it's finished.  Paul modified the above photo using Photoshop.
See how removing the shutters makes the house look larger?

We tested two colors on the back of the house.  We chose the one on the left.  The other one looked too "Smurfy."  Keep in mind that Paul had already begun prepping these windows.  It's going to look worse before it looks better!
The grayish-blue paint that we selected is Poolside by Sherwin-Williams.  The color of our porch will be a dark charcoal, Rock Bottom by Sherwin-Williams.  Our front door will be a bright yellow.

For the next few weeks, our free time will be dedicated to preparing the house for painting.  We have 20 windows that need to be scraped, sanded, and reglazed.  Our siding is asbestos (which isn't really harmful unless you grind it up and snort it) and fortunately it doesn't require much prep work.  The shrubbery at the front of the house will need to be cut back significantly, but probably not removed.

Here's Paul hard at work:
We have an awning covering our back door, which I'd like to keep.  It's currently green, which won't go with the new house color.  Have you ever painted a canvas awning?  What type of paint did you use?

Thursday, January 27, 2011

Silhouettes II

Yesterday while Baby Charlotte was napping and Paul and Joey were out of the house, I snapped a picture of the baby's profile and created her silhouette in Photoshop.  I had begun this project with the rest of the family last week and I was really pleased with the results.  Click here for the original post.  Here's Baby Charlotte's silhouette:
and here's the rest of the family:
 We'll be printing and framing these in the near future.  I'll be sure to update!

Tuesday, January 18, 2011

Silhouettes

In the crafting and decor blogosphere, the rage these days seems to be cut-out silhouettes.  You know, the vintage-looking solid-color profiles.  I've seen fabric silhouettes appliqued on pillows, silhouette Christmas ornaments, colorful silhouettes, silhouettes painted on canvas, and basic black and white framed ones.  For several months now I've been dying to create custom silhouettes of my family.

But how?  I remember in grade school sitting in a dark classroom with a light to the side of me, projecting my shadow on the wall where my teacher traced my profile on black construction paper.  I'm not sure that any of us would sit still long enough for me to do that.  My answer was Photoshop:  Paul uses Photoshop all the time.  He could do it for me.  All that we needed to do, I told him, was to take profile pictures of all of us and he could then do his magic in Photoshop.  And then we could send them to somewhere to print.  I would do it, but I don't know how to use Photoshop.  These would make a great Christmas gift, I told him.  Hint, hint.  To my dismay, my husband never got around to doing this project for me.

A friend shared a link to a silhouette tutorial using Photoshop and I decided to give it a shot.  At least if I screwed up, Paul might be inspired to finish what I started.  That blog author traced her silhouettes in Photoshop, then printed, cut out, traced on black cardstock, and then cut the silhouette out of cardstock.  I decided to use technology to my advantage and cut out a few of those steps.  I took profile pictures of the entire family, including myself which was extremely tricky.  I then traced our profiles in Photoshop, created a white background, and then colored our silhouettes black.  Paul came in after me and modified the proportions and tweaked some other things so that all was consistent.

I'll need to wait until Baby Losavio arrives to complete this project, but here's what we've got so far.  I created the collage below in Picnik and I'm really not sure why the background is teal.  I plan to have the individual 8 x 10 silhouettes printed on photo paper at Wal-mart because their photo processing is very reasonable.  If I'm not satisfied with the results we may have these printed on textured paper at Kinko's.   
Now we just need to rearrange some wall space so that we can showcase our DIY art!

Monday, November 15, 2010

Plain White Onesies

When I was sorting through our baby clothes the other day I found a ridiculous number of Plain White Onesies.  Seriously ridiculous.  At least 15.  And that's just for sizes 0 to 6 months.  Some of these probably haven't even been worn.  Seriously.  I know that I bought them all, but why?  Did I think that Joey needed a Plain White Onesie to go with every outfit?  Regardless, Paul and I figured that we could do something fun with these Plain White Onesies.  Fun as in creative.

Paul's idea was to screen print or stencil designs on the Plain White Onesies.  I suggested creating designs on the computer and using iron-on transfer paper.  Paul is a talented designer (if you didn't already know) and I'm sure that his designs will be awesome.

My idea was to embellish the PWOs (Plain White Onesies) with scraps of fabric, ribbon, and buttons, all of which I had on hand.  I've also been wanting to attempt applique, and practically free PWOs would make a great medium.  And considering that I've got lots of fabric just lying around, I wouldn't feel wasteful if the outcome wasn't perfect.

For the applique project, I found simple images on the Internet and printed them.  I cut the fabric and fusible web (available at fabric stores) to the approximate size of the image and ironed the two together.  I pinned the image to the fabric and then cut it out.  I then ironed the fabric to the onesie and then stitched it for reinforcement and to prevent fraying.  I believe there are "no-sew" options that would probably be worth looking into, since the stitching was the most time-consuming part of the project. 

I'm pretty satisfied with the outcome:
"C" Onesie: 
Font: Adobe Jensen Pro Bold
Crow Onesie: 
Fish Onesie:
Image:  Clker.com
Fabric:  Michael Miller Tortoise Plaid

I also created some yo-yo rosettes to embellish the PWOs, but thinking that they won't launder well I didn't bother to attach them to the PWO.  I think that they would make adorable headbands or hair clips.

Friday, October 29, 2010

Mmm...brownies

I usually buy boxed brownie mix, which is pretty ridiculous considering that I think Bisquick is a rip-off.  However, a few weeks ago I needed something sweet and I didn't have any mix.  So, I went to the Hershey's website to find out what I could do with the ingredients that I had on hand, specifically cocoa powder.  It turns out that you can make brownies.

The following is a pretty simple brownie recipe.  And there's probably a better one out there that's just as simple but I wasn't exactly on a search for the best brownie recipe of all time.  I wanted a recipe that was fast, easy, and required just the ingredients that I had on hand.  Regardless, it sure beats sending Paul to the grocery store at 9 p.m. for something to satisfy my sweet tooth.  He really is not amused by those sorts of requests. 

Ingredients:
1/2 cup (1 stick) butter or margarine, melted
1 cup sugar
1 tsp vanilla extract
2 eggs
1/2 cup all-purpose flour
1/3 cup Hershey's Cocoa
1/4 tsp baking powder
1/4 tsp salt
1/2 cup chopped nuts (optional)

Heat oven to 350°F.  Grease a 9-inch square baking pan.   Stir together butter, sugar, and vanilla in a bowl.  Add eggs and beat well.  Stir together flour, cocoa, baking powder and salt; gradually add to egg mixture, beating until well blended.  Stir in nuts, if desired.  (I actually just throw all of the ingredients into the KitchenAid and don't concern myself with the order.)  Spread batter evenly in pan.  Bake 20 to 25 minutes or until brownies begin to pull away from sides of pan.  Cool completely in pan on wire rack.  Cut into 16 squares, or however you want to cut them.

You can easily do all sorts of variations, like the mixes that you'll see in the grocery store.  For example:

Add nuts.  
Add peanut butter chips.
Add frosting (recipe below).  
Use peppermint extract instead of vanilla.  
Drop chocolate chip cookie dough into the pan with the brownie batter.
Sprinkle with powdered sugar. 
*****
Creamy Brownie Frosting
Ingredients: 
3 tablespoons butter or margarine, softened
3 tablespoons cocoa powder
1 tablespoon light corn syrup or honey
1/2 teaspoon vanilla extract
1 cup powdered sugar
1 to 2 tablespoons milk


Beat butter, cocoa, corn syrup and vanilla in small bowl until blended.  Add powdered sugar and milk; beat to spreading consistency.  Makes about 1 cup frosting.

Wednesday, October 27, 2010

DIY: Joey's Bunk Beds

For several months I have been obsessed with Ana White, an Alaskan stay-at-home mom who designs and builds furniture and then blogs about it.  Paul does not like this obsession.  He has no interest in building our own furniture, although his help is both required and expected. 

Sunday, October 24, 2010

Every Word's a Winner

One of Joey's favorite hangouts is Starbucks, where she loves drinking vanilla milk and playing "the letter game," known to the rest of us as Scrabble.  She enjoys "making words" with the tiles.  She's pretty good at identifying her letters, but doesn't exactly spell yet.

At home we've got a set of plastic letter refrigerator magnets.  Well, we used to have a set.  I think that we might only have eight letters at this point whereas we started with 26.  But only having one of each letter really limits the words that you can make.  Heck, you can't even spell "Mommy" or "Daddy."


I got the idea to make refrigerator magnets out of Scrabble tiles.  We actually have our own Scrabble set at home, but to keep it intact I needed to find just the tiles.  A new Scrabble set costs about $15, but eBay has tons of tiles on the auction block for less.  Since I really didn't have the patience to wait to win an auction, and then for the tiles to arrive in the mail, I used our Scrabble tiles.  I fully intend to order replacement tiles, but at least now I can hold out for the best price.


For this project, I used a set of 100 Scrabble tiles, 100 round craft magnets, and my hot glue gun.  I simply adhered a magnet to each tile using a small amount of hot glue.  Since the glue can get extremely hot, this is not a good project to do with your child.


After an hour of standing at my kitchen counter gluing magnets to Scrabble tiles, I was finished.  I'm very pleased with the outcome.


Warning:  Scrabble tiles are a choking hazard.  If you choose to replicate this project, please use common sense.  Joey knows better than to put these in her mouth.  However, when Baby Losavio (arrives and) becomes mobile, these will be moved out of her reach.

Tuesday, October 19, 2010

More on the DIY Cocktail Napkins

Earlier today I taught myself to make cocktail napkins with mitered corners.  I initially tried to figure out how to miter on my own, then referenced a web tutorial, which confused me, so I then figured out how to do it my own way.  The first napkin took a while, but I've knocked out several more since this morning.

I am horrible at explaining things but I'll give it a shot.  For the life of me I cannot remember sewing jargon.  I had difficulty recalling the word "crease."  Anyway, this is what I did:

Cut fabric to 2 inches larger than desired size.  Fold over an inch on each side and press.

Fold the one-inch sections in half and press.
 Your creases should look like this:
Fold the corners in and press.  The fold should be at the corner of the inner crease.  Flatten the napkin and flip it over.  Fold the napkin to make a triangle and sew along the corner crease.     
This is what your napkin will look like after sewing all four corners.  This is inside-out.
 Snip, snip.
Turn the napkin right-side-in.  Refold your creases and press again.
Stitch the hem of the napkin.
Voila!
This process actually requires more ironing than sewing.  I'm lazy and I don't like to use pins, but I think that if you make sharp creases when you press, it's not really necessary to pin.

LinkWithin

Related Posts with Thumbnails